Table of content
- Introduction
- Overview
- How to detect the technique ?
- Unpack Princess Locker
Introduction
Malware authors try to hide themselves from antivirus and make analysis harder. One of technique is called “packing”, it means to make the code obfuscated and unreable. In this post, we’ll look at one specific kind of unpacking technique that you can use to finally start the analysis of the real payload. This technique is called Self-Injection.
Self-Injection is the term to define that the malware will unpack himself inside the same process as the packed binary. It will overwrite binary sections in memory, then it will transfer execution to the overwritten section of the PE file.
In this tutorial, I’ll explain how this work and how to unpack Princess Locker sample.
Overview
The techniques is split into 4 parts:
- Allocate Memory
- Write PE inside the memory allocated
- Setup the memory section to be executable (if it was not the case)
- Execution of the PE file in memory

How to detect this technique ?
Put the packed malware into a sandbox like Hybrid-Analysis.
In the process analysis section, if you see that there aren’t any subprocesses. The malware must use self injection.

Practice time
As an example we will unpack Princess Locker malware
SHA256: dc7ab2e7ed26554a11da51a184e95b01e685b1a2f99c7fc77d54d5966530bf60
Link: https://malshare.com/sample.php?action=detail&hash=93cb0053e883fb262f9f795f327152f8
Environment: Win7_x86
In order to dump the new PE file that will be writen in memory, we put 2 breakpoints:
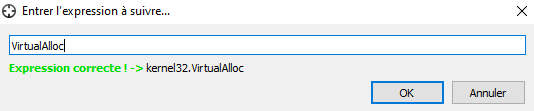
- VirtualAlloc
The breakpoint on ret because EAX will contain the base address of the new memory segment that was allocated.
MSDN_VirtualAlloc


Once we hit the breakpoint, we can see EAX with 0x640000

When we show the content at this address, there is nothing but null bytes.
 We’ll keep execute the binary. After several break we finally find something that looks like a PE file at 0x640000
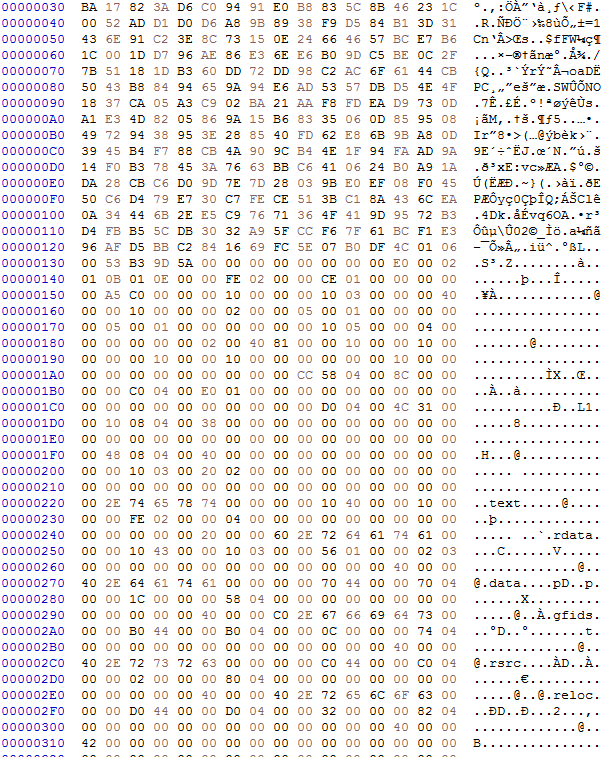
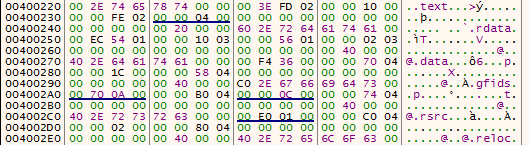 We can see the section table (.text, .rdata, .data). Indeed above this section table there isn’t the header of a PE file (magic byte “MZ”). It’s a particularity of this malware. We aren’t going to cover this part in this tutorial.
Now we’ll put an execution breakpoints on this memory section. When ever the PE file is executed we can grab the content of the file.
- Execute breakpoints
Firstly, we’ll follow in memory map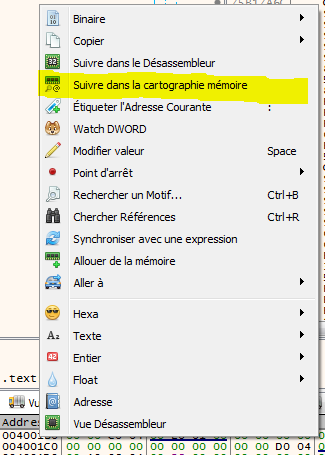 Then we put the breakpoint.

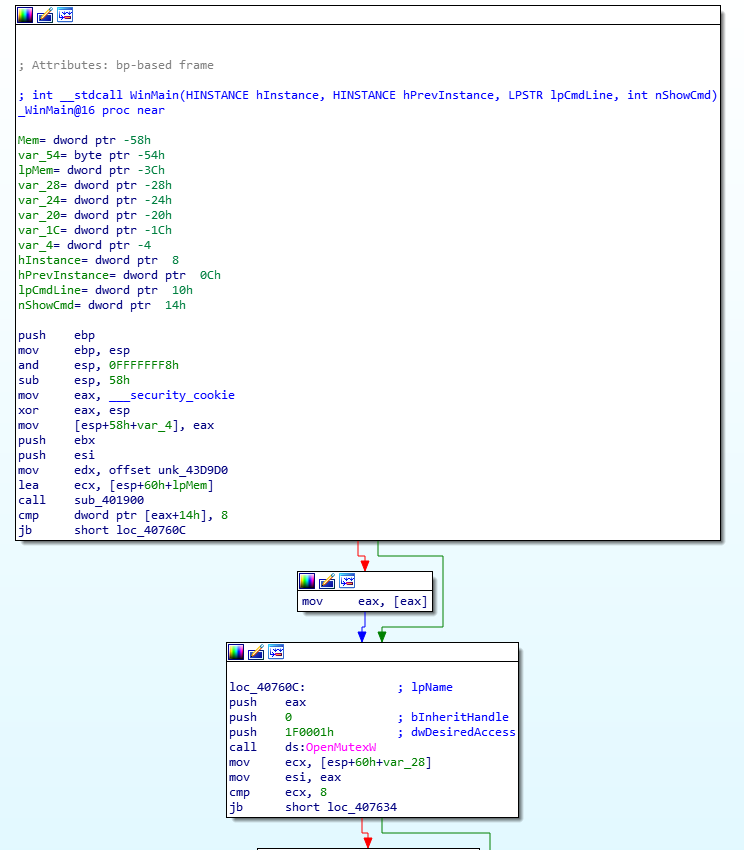
After several hits of VirtualAlloc return breakpoint, the memory segment at 0x400000 is executed.

Let’s dump the PE file which was executed in memory.
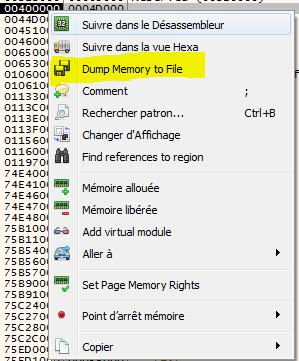
Open the PE file in hex editor like HxD
The unpack is now over, congratulation you unpacked a malware that use self injection technique.
The dumped payload header is not well form. The next step to completely unpack Princess Locker is to fix the header and unmap the binary. Unmap is a word to define the translation between disk address and memory address (virtual)
Patch header
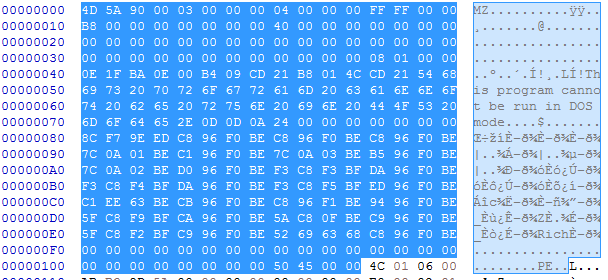
Firstly, you have to run a hex editor. The patch will be easy, we have to copy the bytes from the Optional Header because they can’t be modify by packers. According to this PE poster, we’ll use the machine magic byte 4C 01.
To sum up we’ll copy the bytes before 4C 01 from the original packed malware and copy them in the unpack one
And paste it in the unpack PE file:
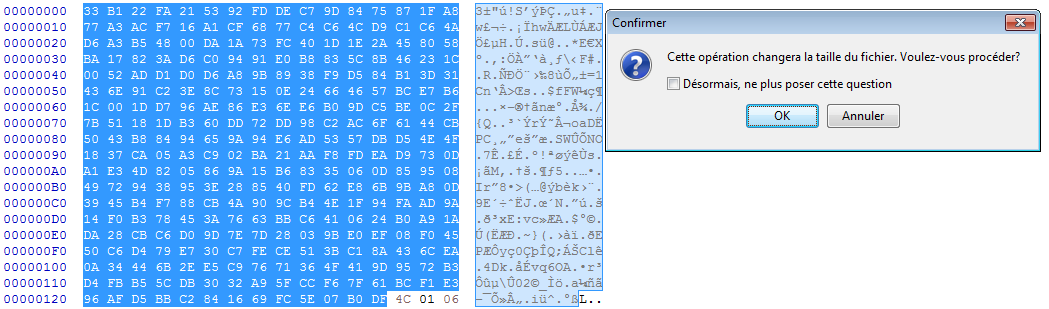
Finally, you can save the file. The last step is to unmap the binary. Indeed when you dump a file in memory, there are shifts between location on disk and location in memory. We have to line up both to recover a working PE file.
Open the modified file in PE Bear
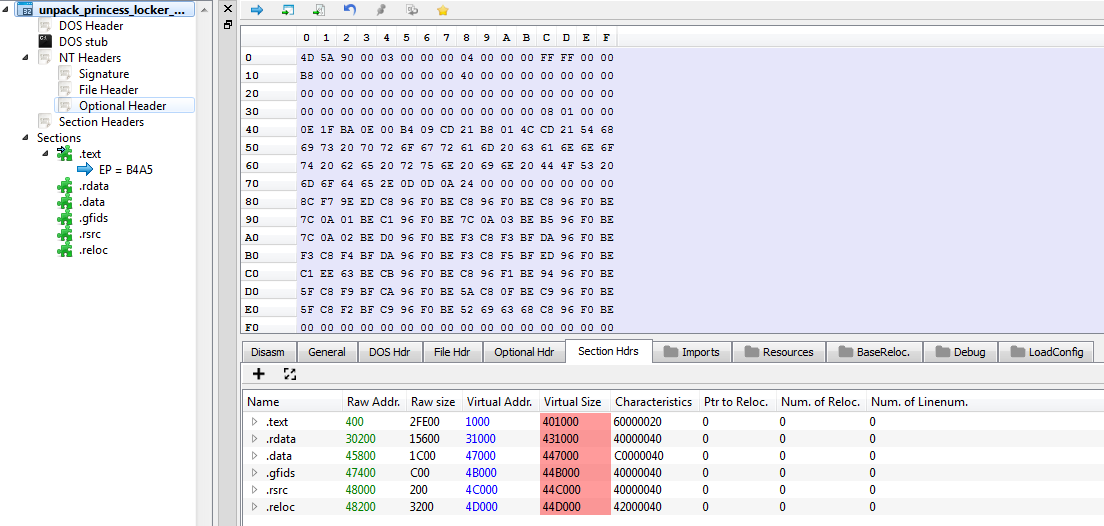
Here are the differents modification, you must do:
-
Raw Addr must equal Virtual Addr

-
Raw Size must equal to the difference between start of next section minus end of the previous section. Ex: 3100 - 1000 = 3000
 Because we are unmaping a PE file, we don’t need relocation table. It only exist on disk. Disk and memory data must be the same.
 -
Virtual Size must equal the Raw Size

-
Save the new file
We can see that there are still red highlight on the PE Bear tool. This show us there is a problem with section alignment. What we do now is check section alignment with Hex Editor.
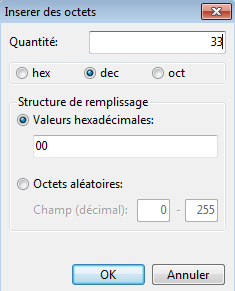
Between header and section, it’s fill of null bytes. .text section start at 0x1000. So it must have null bytes until the beginning of the section.

As you can see this isn’t the case. We have to shift this data 33 bytes (16 * 2 + 1) lower to make E8 start at 0x1000.

Dump the patch file and open again PEBear. Red highlights are gone, there aren’t problems anymore !

Now, you could import the final unpacked file in IDA to start the analysis !